Electromagnetic Pulse Valve Failures: Reading the Symptoms Correctly
A pulse valve that will not fire and one that will not close look like different faults. Mostly they are the same three components in different states.
Diagnose in order: power and signal, then air supply, then the valve internals.
Coil resistance measurement separates electrical failure from mechanical sticking.
Continuous leaking usually means a damaged diaphragm, seat debris or a blocked bleed orifice.
Weak injection points to low supply pressure, line restriction or reduced diaphragm travel.
After repair, verify with a hold test and repeated firing before returning to service.
Technical Overview
Diagnose in the right order
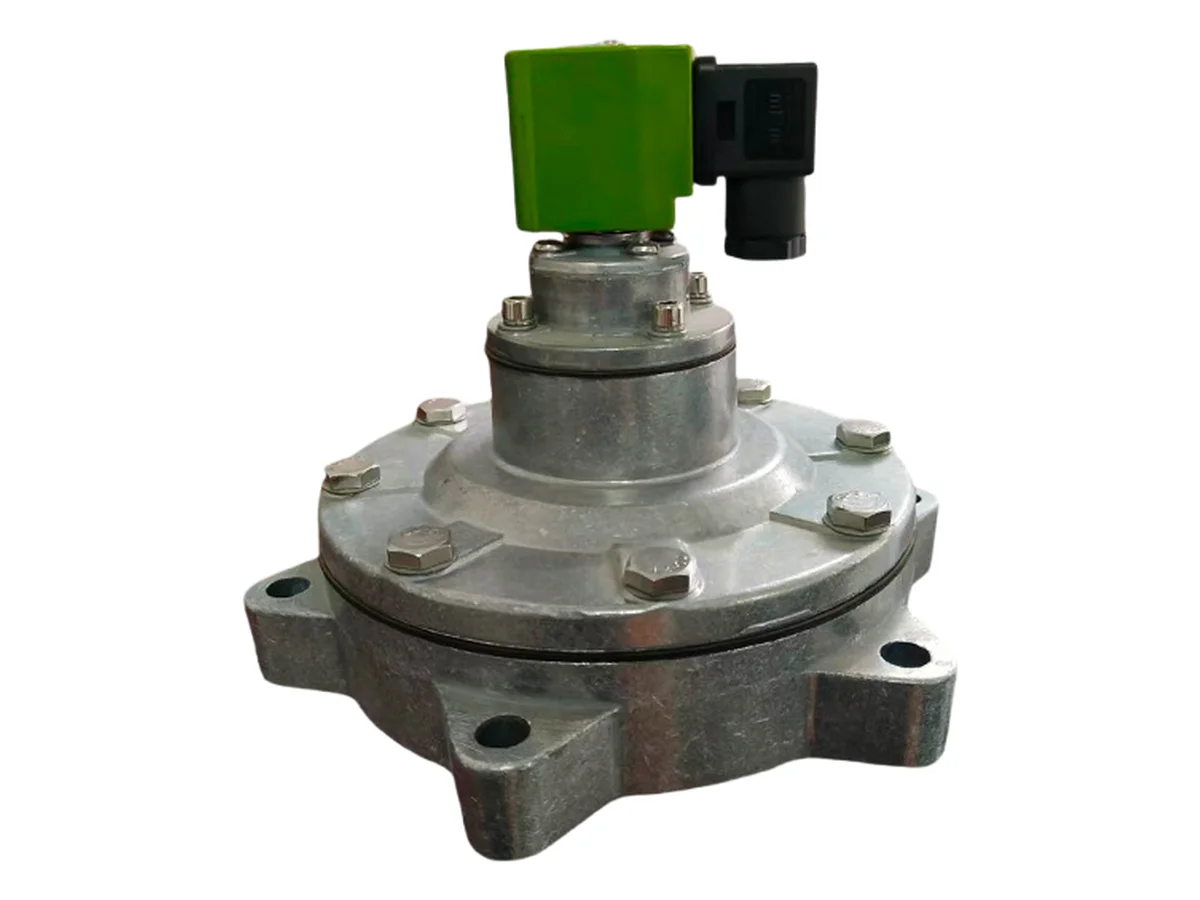
A pulse valve has three subsystems: the electrical side (controller output, wiring, coil), the pneumatic side (supply pressure, filtration, moisture) and the mechanical side (diaphragm, spring, pilot, seat). Faults present identically from the outside — no injection, weak injection, or continuous leaking — so the productive approach is to eliminate the cheap and accessible before opening the valve. Power and signal first, then air, then internals. Working in that order resolves most call-outs without dismantling anything.
Symptom one: no injection at all
Start at the controller: confirm the channel is actually outputting a signal, and check the indication on the panel. Then measure voltage at the coil terminals and confirm it sits within tolerance of the rating. Measure coil resistance — a reading of zero indicates a short, an open circuit indicates a break, and either means the coil is finished. Inspect terminals for looseness or oxidation and the cable for damage. If the electrical side is sound and supply pressure is correct, the problem is mechanical: a blocked pilot or bleed orifice, a stuck pilot plunger, a torn or hardened diaphragm, or a failed return spring.
Symptom two: continuous leaking or failure to close
This is a sealing or pressure-equalisation problem. The diaphragm has to be pressed onto the main valve port by the pressure differential across it, and a bleed orifice controls the balance between the upper and lower chambers. If that orifice blocks, the chambers cannot equalise and the diaphragm cannot close. Other causes are a diaphragm that has aged, cracked or picked up oil, debris or scoring on the seat face, a fatigued or broken spring, and loose fittings at the valve body or pipe connections. Identify where the air is escaping before stripping the valve.
Symptom three: weak injection
Weak pulses are usually a supply problem rather than a valve problem. Check pressure at the valve inlet against the rated working band, and confirm it does not collapse during a sequence. Look for a blocked filter, a kinked or undersized branch line, and leaks at the manifold or connections. If supply is genuinely correct, the diaphragm may not be lifting far enough, or the blow tube, nozzle and venturi may be misaligned or partially blocked. Restrictions downstream of the valve cost more pulse strength than most people expect.
Symptom four: hot or burnt coils
A coil that runs hot or fails repeatedly is telling you something upstream. Confirm the supply voltage is within the coil's rating — both over and under voltage raise current and heat. Check that the controller's pulse width is set within the normal band, since an excessively long pulse holds the coil energised far longer than needed. Confirm the coil is rated for the duty and matches the valve. Clear dust and debris from the coil housing so it can shed heat. And check for a diaphragm or pilot that is sticking, because a valve that never completes its cycle keeps the coil energised and cooks it.
Cleaning and reassembly
When a valve does need to be opened, blow out the pilot and bleed orifices with clean compressed air and clean parts with a suitable solvent. Inspect the diaphragm for cracks, hardening and blocked orifices, and the seat face for scoring or embedded particles; light scoring can be dressed, deeper damage means a new seat. Refit with new seals where supplied and tighten the cover bolts evenly in a diagonal sequence so the diaphragm seats square. Uneven tightening is a common cause of a leak that reappears immediately after a repair.
Verification before returning to service
Hold the valve at working pressure and check every joint for leakage. Then drive it from the controller and fire it repeatedly, confirming each pulse responds promptly and fully without delay or sticking. Record the fault, the parts changed and the date, and fold that into the preventive maintenance interval. Where one valve in a bank has failed, it is worth checking its neighbours and the air quality that caused the failure — diaphragm life is far more often an air-treatment problem than a component-quality problem.